Otrona Attache
Tag: #retrotech
Author's Note: this is a reprint from my old blog site over at SDF, where it will still be viewable for a short time before I repurpose that space. A few notes have been added for clarification or updating. I really wanted to bring this article over here because I plan to revisit this machine soon since it never did get fully up and running.
Original Publish Date: February 19, 2023 on SDF.org by tinsmith
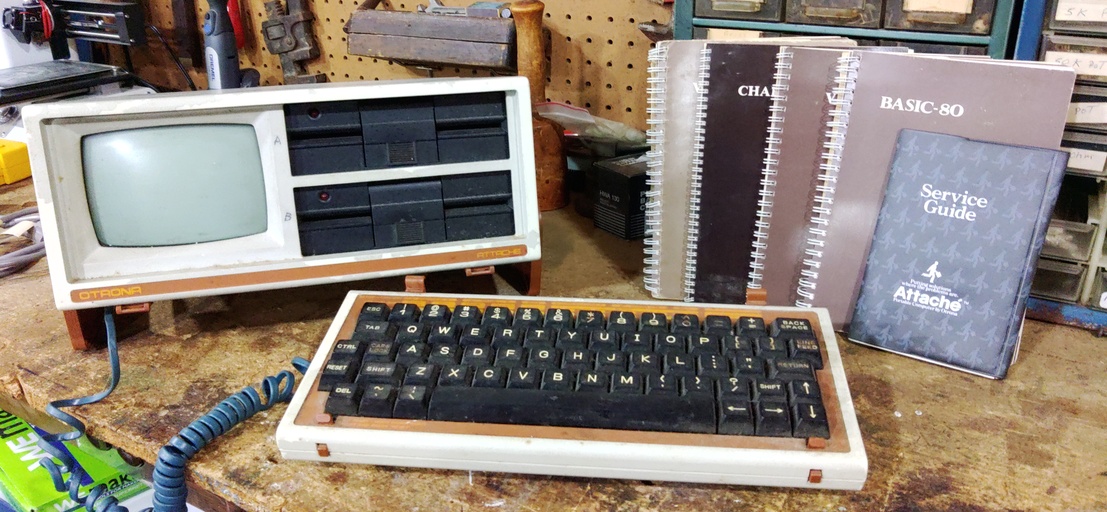
My New Year kicked off with the acquisition of a lovable luggable from 1982. This Otrona Attache was deemed the BMW of luggable computers in its day, coming in a bit smaller and lighter weight compared to most other portables at the time. My particular model runs the CP/M operating system, and there was apparently a daughter board with an 8086 processor that allowed it to also run early DOS. It was otherwise powered by the beloved Z80 CPU, but lacked any real IBM compatibility. For as great as this computer was, the Otrona company was a flash in the pan, lasting only 3 years and producing about 5000 Attache units, of which mine is number 2218. A rare find, indeed.
Initial inspection showed some pretty obvious signs that the case had been opened before, probably more than once. One red flag is always finding odd screws that clearly did not belong to the original build. Thankfully, I have a massive collection of small screws, so it wasn't hard to find better replacements that were less brutal to the machine.
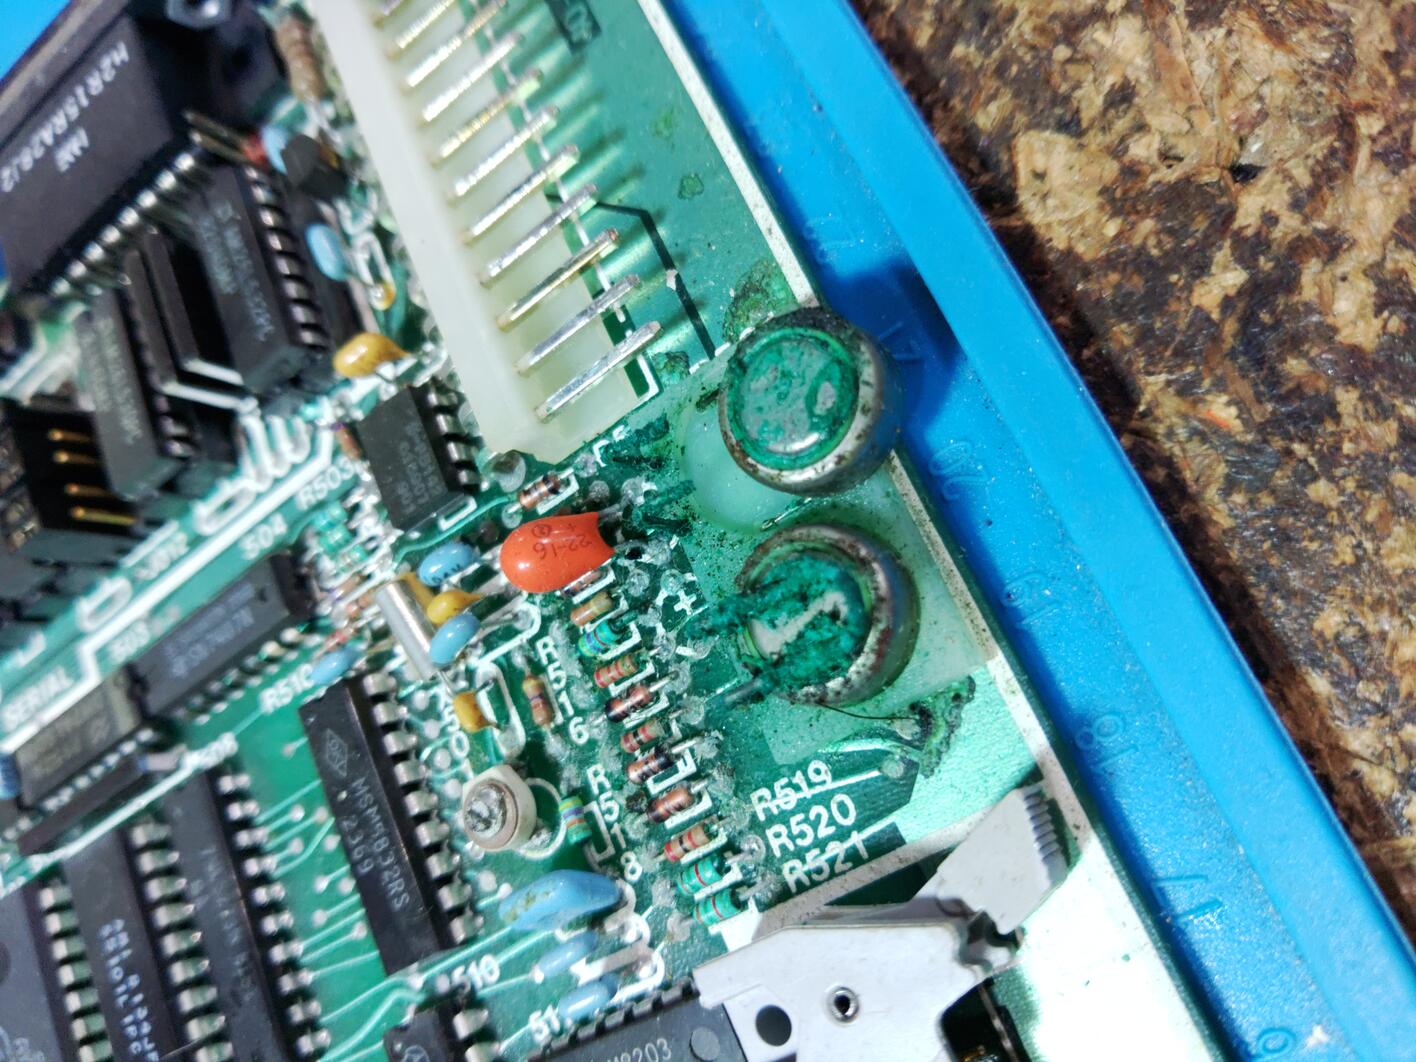
After getting everything opened up and seperating the modules and board, the first thing that caught my eye was the horrifying condition of the clock battery. There was no way I wanted to turn the machine on with the amount of corrosion that was going there, so that needed to be tackled. I desoldered the whole thing from the board, gave the traces a gentle scrub with QD cleaner and a soft brush. In this process, the battery contacts crumbled in my hands, so I clipped some stiff, springy leads off some old ceremic resistors and used those to form new contacts through the plastic base. Once I soldered everything back together and installed new batteries, it seemed to be holding nicely. The last thing we want is a clock battery to come loose inside the case and cause a short somewhere else.
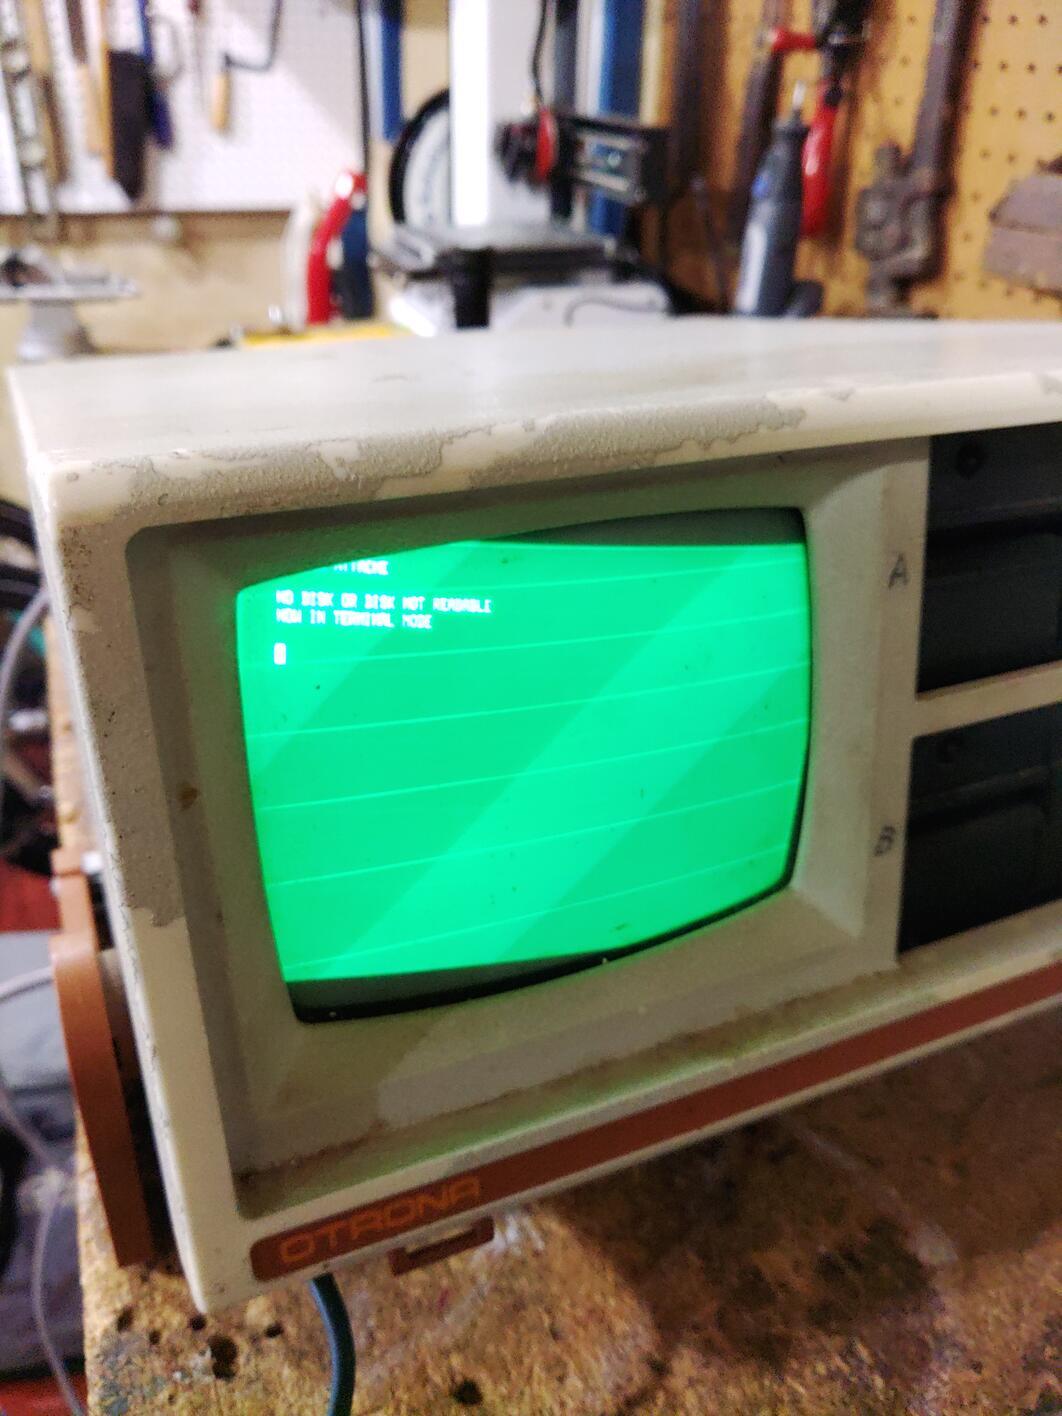
Feeling good about turning it on, I reassembled the machine and flicked the switch only to find two larger issues. The CRT image was severely out of alignment and the keyboard was not responding. After deciding to try and fix the CRT first, I stepped back a bit to learn more about how they work with the help of some fellow vintage computer junkies at the Vintage Computer Federation. Going into it, I had assumed it would be a simple fix of locating the horizontal and vertical hold knobs, and giving them a few tweaks, but no dice. I did find the contrast and brightness, which fixed the color, but the h/v-hold did not fix the twisted image. As it turns out, the yolk was completely off axis, and needed to be reset with the locking nut tightened. Whoever had been in this machine before me apparently never locked it back down.
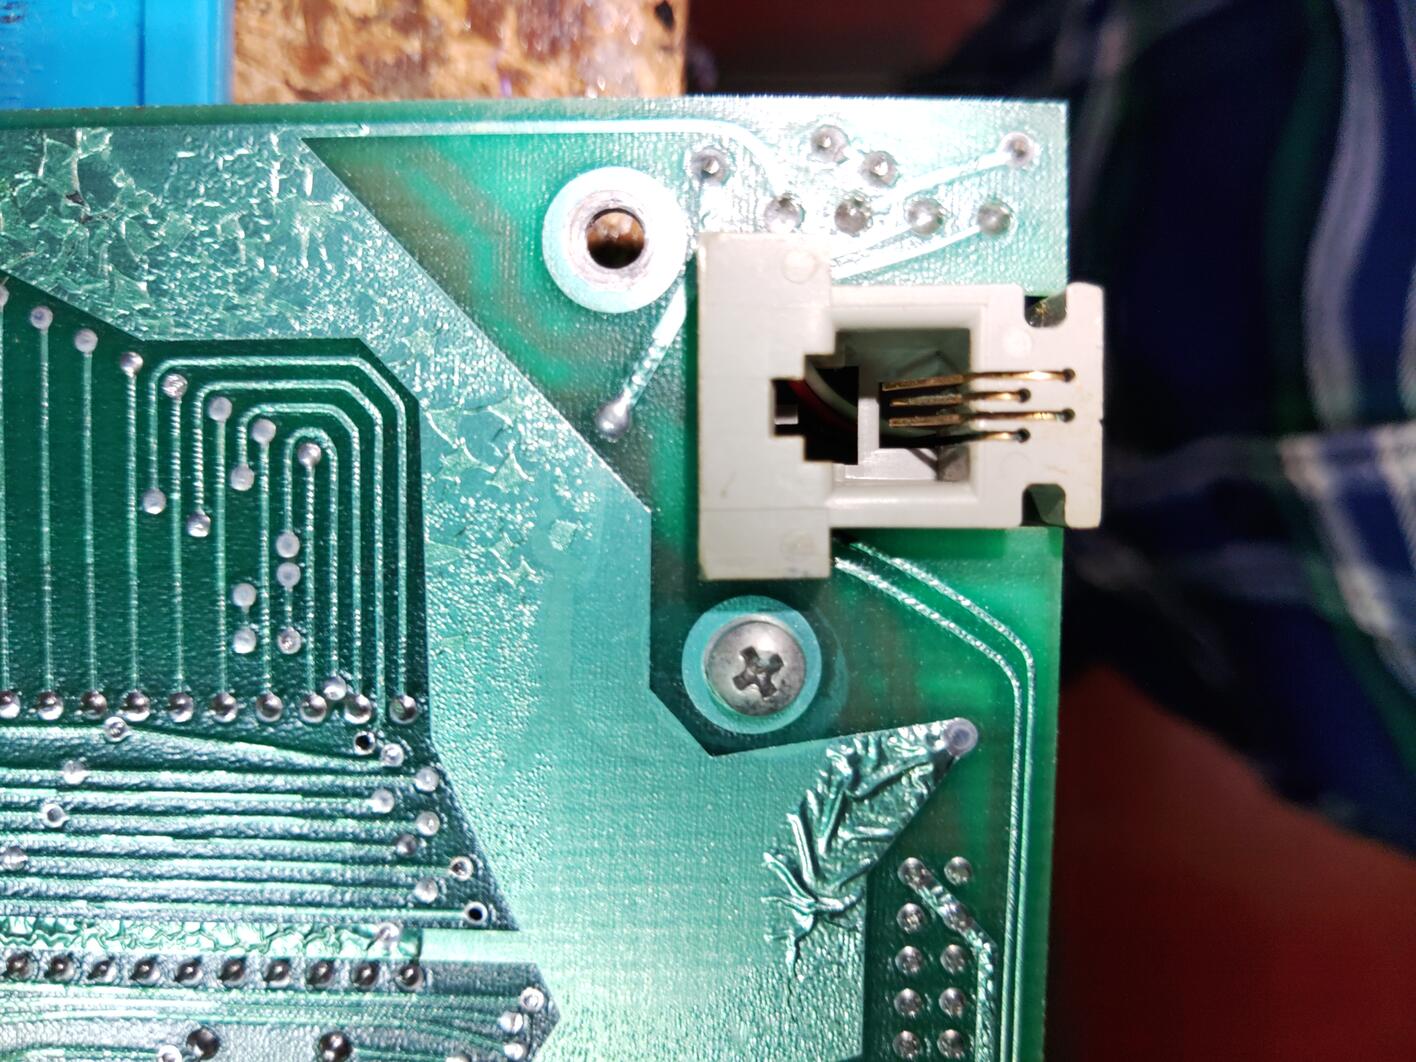
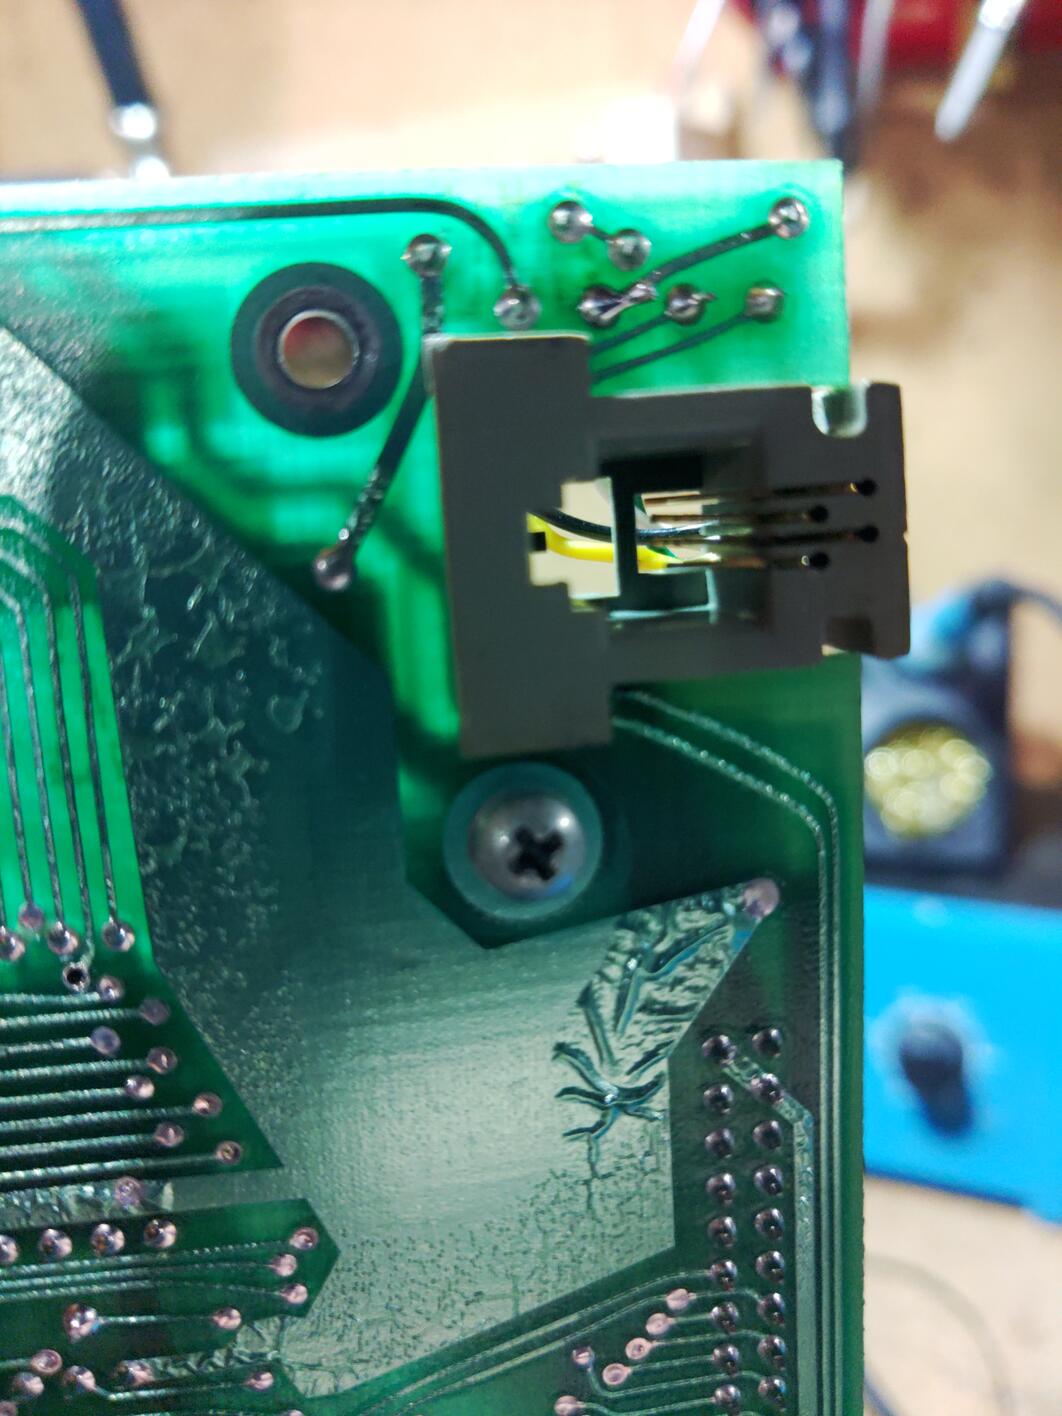
You'll have to excuse the photos being out of order (they were fine, I don't know why I wrote this ~ benchly), since I could not actually activate the test pattern to properly align the CRT until the keyboard was communicating with the machine, and that turned out to be a whole ordeal. The keyboard plugs in via an RJ-9 jack that is similar to the old RJ-11 jacks you'd see on telephones, but a bit smaller. One of the four contact pins had completely snapped off due to corrosion right at the joint. After cleaning the jack on the board, I removed the remainder of the broken pin and harvested a fresh one from an old phone jack I had laying around. It was quite the task to actually get it threaded through the tiny hole in the plastic, then get it to align properly with the slot on the male end of the jack. When I work with really tiny stuff like this, it reminds me just how bad my eyes have gotten (my best advice to the young; don't get old ~ tinsmith).
After a few tries of finessing that new pin to stay straight when I plugged in the keyboard, we finally had communication, and I could send some basic test commands to the computer. This really helped align that CRT once I could see a bit more text. There's a neat keyboard test that allows you to see the hex value of each key, as well, so I went through that process and everything seemed to be in order (this also confirms every key was working ~ tinsmith). Here's some additional photos below for those that are interested in seeing more of this machine's internals.
Click here to see the full image gallery from the original article
I'm really happy that the repairs needed were only minor, although I have not been able to test those kinda-half-height 5.25" floppy drives since I haven't been in posession of a 5.25" floppy disk in about, oh, 30 years. Naturally, I took to the Internet and found an eBay seller with some new old stock, so I ordered a box that should be here soon. The next steps will be figuring out how to create a CP/M boot disk for this little machine, and start hunting down the software. This one came with manuals, but no disks, sadly, so that will be a challenge in and of itself since I've never actually had to install the CP/M operating system. Let the games begin, I guess!