The Page That Binds Us
Tag: #offbeat
Most of the people I know in tech have too many hobbies. I'm no exception.
We get into tech because we like to experiment, which there is plenty of room for. Our curiosity often demands trying something new, something different, ideally straying from one's lane now and then for the sake of gaining new perspective. So, deciding to give my laptop a break from staring at the grey hairs in my beard and the bags under my eyes, I tried some bookbinding! Case binding, to be specific, which basically means if you like it then you better put a hard cover on it.
The word 'tried' is doing a lot of heavy lifting. Here's the story!
Jump to:
Books Are Medicine
Nerds tend to like books, that much is certain. Maybe it has to do with the exchange of information being the glue of everything we do. I'm not going to analyze it too deeply in this article. That particular cave drills deep into the earth, ready to challenge our reasoning with twisting passages and sharp drops. The simple take is "we just like to read," and that satisfies me greatly. Although, perhaps it has more to do with the desire to learn, to add to one's own understanding of the realities around them.
If you're anything like me, holding a physical book does something in your soul, resulting in an ever-rotating library of interesting titles that must be added to whenever possible, forming an approximation of the current version of one's self as it changes and moves with us through time. Heady, I know. Note that this DOES NOT mean I dislike eBooks. I love those too and very much enjoy using my Nook for bed-time reading, travel or when I am unable to find a paper copy of something. Yes, you can be a fan of both options, for each has merits. In either case, the act of reading can be a spiritual nourishment, if we let it.
The roots of my reliance on books as a form of therapy naturally go back to my childhood. My parents, being nothing particularly special or unusual for middle America at the time, fought and screamed a lot, usually about money...although in retrospect, had either of them had any greater sense of self-awareness, it was probably more about their needs being met and not feeling heard by their partner. In any case, child me had no real escape from that noise, save for headphones, some cassettes and books. I was never left wanting for books, either. Despite the fact that my mother took every opportunity that she could to point out my apparent stupidity, some hallowed redemption came whenever I asked for more books, because she would happily provide them. I usually asked for books about dinosaurs, airplanes, and outer space, but I was really just curious about everything. Can't say my tastes as an adult have changed much. Expanded, a lot, sure, but still definitely include dinosaurs, airplanes and outer space.
Don't even ask me about the cassettes I wanted. Look, I was really into those nature sounds recordings, okay? It's fine. Thunderstorm noises? Put it right in my ear.
Failing Funly
The trouble started, as it often does, when my wife saw me watching YouTube. "These book binding videos are really something," said I, innocently enough. Our collection features some really old books that time and frequent relocating have not been gentle to, so I started wondering how easy it would be to remove the old cover, then create and apply a new one. The books in question are not particularly valuable to anyone but me, so the added benefit of ending up with a completely unique copy of the book was also appealing. Spoiler alert; it's way harder than it looks and I cocked up this first one.
My birthday was coming up, so being the supportive and encouraging person she is, she booked us a class, one that had us making the whole book from scratch, which was as awesome as it sounds. I learned about creating and sewing signatures, the term for "groups" of pages that get stitched together to form the text block, a book without a cover. There's all sorts of specific terminology that I will probably get wrong because I've never been one for heavy jargon, since it's a bit classist to put esoteric language into article without explaining any of it. This is, of course, at odds with my notion of the importance of knowing the name of a thing, for if you cannot at least name it, you have not begun to seek understanding of it. My particular electric ham is full of contradictory thoughts that happen with or without my permission, which causes a lot of confusion for me.
The class was a blast and had me hooked, us having left with a simple but professional looking hardcover journal that we put together with basic materials. The school where the class was held also offers a paper making course, but I'm not sure I want to dive that deep since it requires a significantly different workspace and commitment, neither of which I have the space or bandwidth for at this time. Returning home, I ordered some supplies and selected a book that I would attempt to repair.
As mentioned, I screwed it up, but one must never shy from the lessons of failure. Errors, mistakes, and near-misses should be the tools you use the most, otherwise you're just doing it wrong. People find they learn best in a few different ways, but one common thread shared among all of them is allowing yourself to not be good at something. It's fine. No, really. Get out there are suck at things if you want to feel real pride, because there is no greater boost to one's self-worth when we start from ass, keep workin' it, then realize we're still pretty ass but much more toned and worth a cat call or two. The process of improving one's self is central to being alive and necessary for growth as individuals, which is why we are inclined to share what we do on social media. We want people to notice that we're working on it. I assure you, that's okay, so long as you remember to not just talk about it, but actually do it.
The media we are exposed to often shows us only the end result of hard work, persistence and practice, rather than showing the hard work, persistence and practice itself. When we over-expose ourselves to this, we develop a warped yard stick for our own self-worth. In the US, we used to call this "keeping up with the Joneses," referring to using our neighbors or peers as benchmarks for our own success. Eschewing all the silly little parts that make us us, we waste energies focusing on the idealized self, constructed from the limited information we receive from presentation of the idealized selves of others, in effect giving only a cream-of-the-crop comparison, which is ridiculously unfair and in most cases, impossible to actually achieve. This is something that has drawn my curiosity for a long, long time; the effect of our modern technology-driven interconnectedness on our sense of self, our agency and our understanding of our place within each others sphere's of influence. There's...well, simply too much to say on that for a single article to be sufficient.
Not A Tutorial
One of the first things I realized when I started was repairing an existing book is a very different undertaking than creating one. Armed with my novice understanding from the class, YouTube videos that show you only the successful takes and the reliance on my ability to problem solve, I waded into these murky waters anyway.
I needed tools. I love tools. Tools are extensions of our capabilities. The cool thing about tools is, sometimes, you can just make your own! Tools!
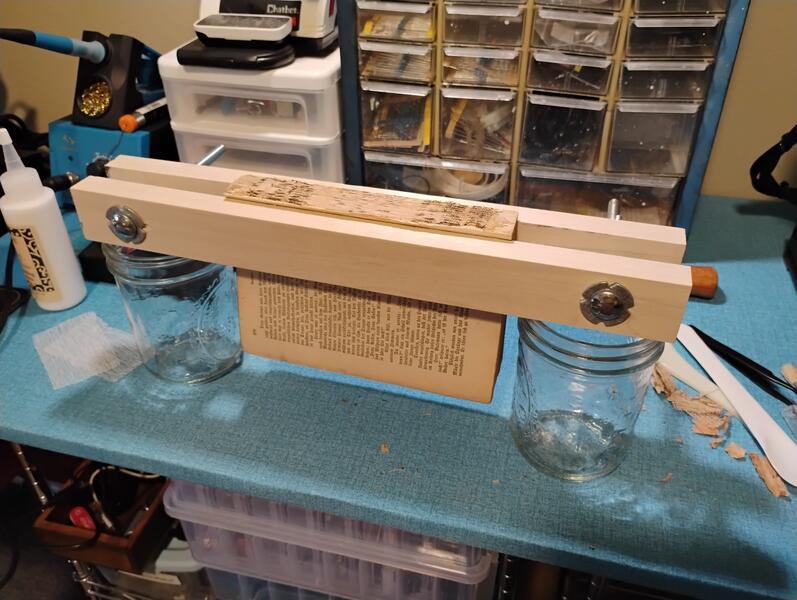
The simple wood clamp is the easiest way to go for the book nerd that does not have room in their apartment for full sized clamps and presses, being very similar to the ones we used in the class. I made mine a little bigger with some longer carriage bolts since some of the books I have in mind for repair are thicc with all that juicy esoteria. For materials, I went with some 5/8" x 1-3/8" poplar boards, trimmed down to 15" long pieces. Combined with 5" carriage bolts, washers and wingnuts, I ended up with a basic clamp that will accommodate books up to about 3" thick and 12" on the long edge, good for my needs without being unwieldy. If you do make one, it's not necessary to use the locking washers like I did, those having made it on to my clamp simply because they were in my random hardware bin. To be honest, they don't work all that well and tend to fall out. Regular flat washers would be better.
The clamp is also fairly light, so it's easy to prop the ends up on blocks or something (or, weirdly, mason jars). This just positions the clamped book nicely when it comes time to add the archival glue to the binding.

The glue choice needs some attention, since using the wrong glue can damage the paper or prevent the book from opening properly. Archival glue has a neutral PH, dries clear-ish and remains flexible after setting, all of which are important in making a strong, yet flexible spine. Get some small trim brushes for glue application. Keep in mind you want a couple different sizes, since glue will need to be applied to the narrow spine, but also the large area of the inside cover (aka "case") and decorative end paper.
Not just a cool name, 'bone folder' refers to a small hand tool that is used to create crisp creases and tucks in the paper, smooth out the cloth covering being glued to the case, etc. The cheaper ones are made from teflon or some other plastic which works fine in my limited experience, but some are actual bone. You'll have to guess whose. Fun! They come in a variety of shapes, sizes and decorative colors, but it's best to pick up a few different ones until you get a sense of how they feel in the hand. In all fairness, I did some origami in the past and got used to using the flat of my thumbnail to put really nice creases in paper, so I found myself just doing that, saving my bone folder for pressing and smoothing out the cloth cover and end paper. I'm a bit of an anarchist.
Since I was repairing an existing book, the other other materials needed were the high-density cardboard for the case, something to use as a cloth cover, some fun paper for the ends and little bits of material with a decorative stitch on one side, referred to as head banding. All of these can be ordered from the supplier of your choice, but I have linked local favorite Hollander's below. Any supplies I did not make or find came from them.
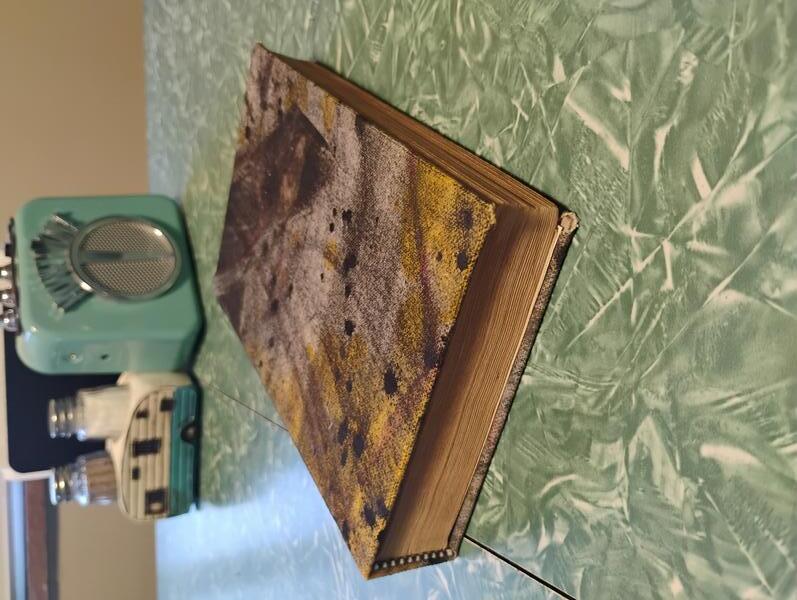
Speaking of, I decided to try an experiment since I have no idea what I'm doing and wanted to set myself up for additional needless challenge instead of just getting the basics down first like a normal human being. The cloth cover is what wraps around the case, the part you see when the book is on the shelf and closed. There's a huge variety of materials you can use for this, but i decided to use some discarded old canvas that a local artist had offered up. They had applied some water-based spray paint to the canvas, resulting in a moody melange of greys, blacks and a bit of yellow. It did not fit the book in any real sense, but I less interested in the aesthetic quality and more interested in experimenting with a found material rather than ordering new cloth for the cover.
If you've read this far and are expecting a tutorial, that's not really going to happen. I don't write tutorials for fun because I spend a lot of time writing SOP documentation at my job. It is tedious and unrewarding, teaching only a prescribed method rather than illustrating how to think critically about something. I find them restrictive, anti-growth in a way. When I read about someone's experience with a thing as opposed to a systematic step-by-step explanation, my mind engages more about possible variations I could try, which promotes problem solving and deeper thinking about about the process. Not that tutorials are bad. They're often a great place to start, at least, but try to move away from them as soon as possible.
Think of Lego. If you follow the instructions, you build a neat thing, but you didn't do any real work to get there; just placing the pieces where you were told to place them. In a way, it defeats the core modularity of the Lego system, but the instructions are really there to train you a tiny bit, show you that this is just one possible thing you can build with the parts you have. Then you break the thing down and make something else without instructions, engaging with the bricks at a higher level. Ever met someone who just builds the set per the instructions then puts it on a shelf? Or worse, leaves everything in the box so they can "collect" it? God, they're boring.
I'm kidding, you are all lovely and you do you and don't let anyone futz with that.
Point is, I do not feel like I'm adding anything to the conversation by writing a tutorial for anyone. I'm not helping enrich their lives in any sustainable way. I'd rather share my life in a way that allows you inside my head so you can understand my experience, which might be a wee bit narcissistic but damn it, when I read other people's blogs I enjoy, I'm looking to read about their experience. Tutorials don't help you when things go wrong and you need to troubleshoot, or you encounter some undocumented variable that...you know what? We are getting off track. Quelle surprise.
Anyway, not a tutorial.
The Book Of Storm
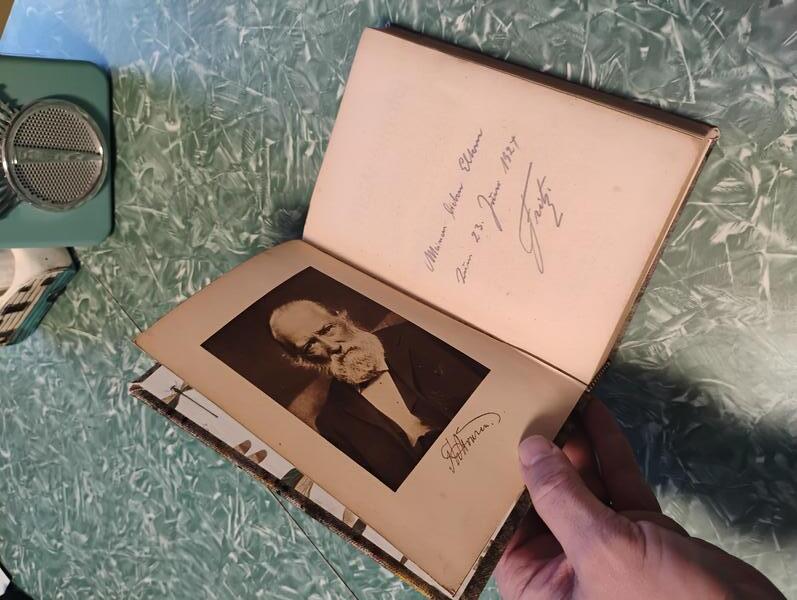
The chosen book was a collection of work by Theodor Storm, a writer and poet that helped define the literary realism movement in Germany during the 19th century. The subject matter is inaccessible to me since I can barely read German, but it was the condition of the book that made me want to try my hand at repair, having obtained this copy for free from a very large local used book dealer that often offers books in this condition at no charge, depending on the rarity.
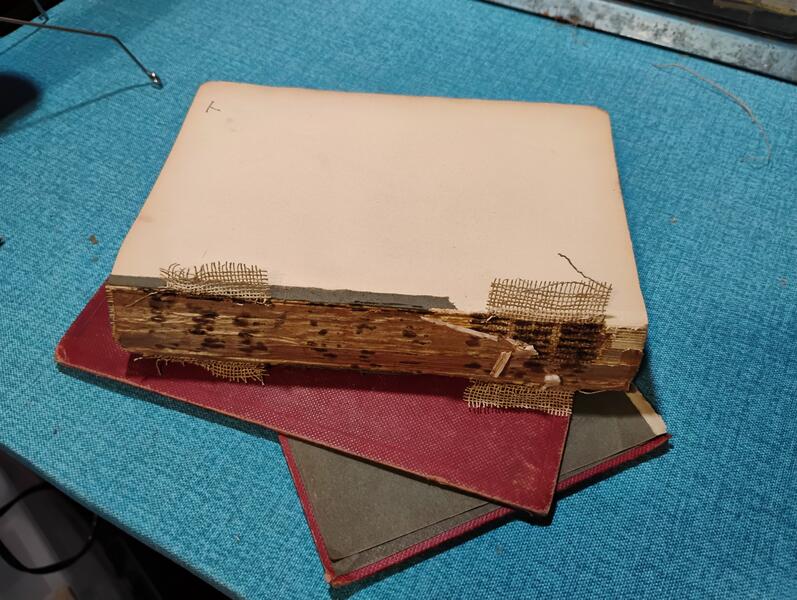
The spine was gone, exposing the decaying glue and crumbling mull, which is a woven mesh of cotton material that serves as a sort of connective tissue, joining the text block to the case. I decided to remove what I could by using the sharper edge of one of my bone folders. A gentle process, to be sure. I was absolutely terrified of pulling away too much, lest the already delicate pages start tearing or the thread holding the signatures together break. It held up to my abuse nicely.
The first "uhh, oh. hmm" moment I encountered was what to do about the loose back page. The book's cover was in tatters, taking the last page with it, having originally been glued to the inner decorative paper. It was salvageable, no doubt, but I had no idea how. The only way I figured to save it was to glue it to the end paper, then "edge glue" the page back to the signature it belonged to. This worked, but left the back page sticking out a bit, requiring me to trim some of the margin. If you happen to be an actual book binder or book repair person and you have read this article without throwing up or becoming violent, you have my thanks and respect, because I know I'm absolutely butchering this poor book in the name of experimentation, like the surgeons of old did with stolen cadavers. Sorry.
I found canvas took the archival glue without issue, which was a bit of a worry since I was warned that some materials will allow it to soak through. However, a different problem arose. The ink from the painted side was coming off on my hands the more I handled the fabric and book, prompting frequent and inconvenient hand washing during this process. Noted.
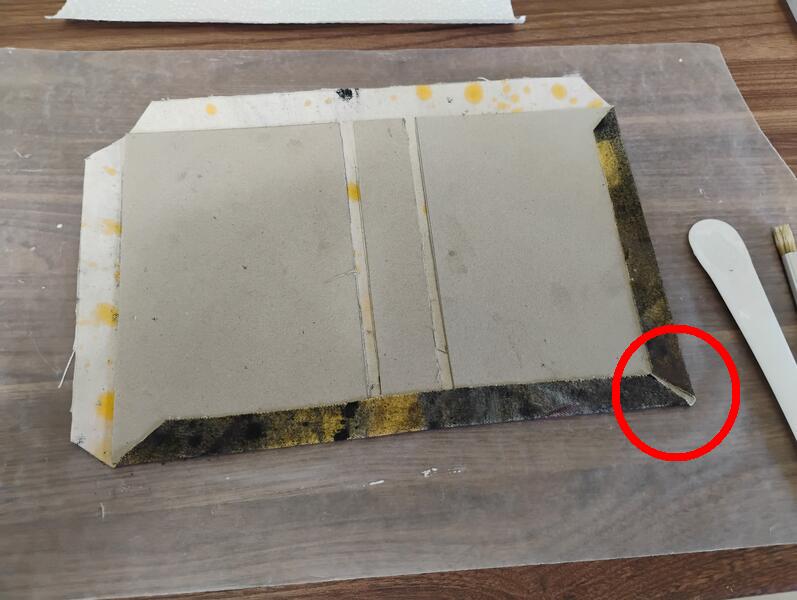
I also failed at measuring and anticipating my folds. While I got the spine width just right, which was I super worried about, I completely missed the mark on leaving enough material to make sure the corners were completely covered. You can see in the photo that there needs to be a 45 degree cut on the corners to avoid bulking the material when you fold in the overhang. I went in too close with the cut, which should have probably been 1/2" (~6mm) instead of 1/8" (~3mm). It's mismeasurments like this that cause me to question my career choice and why anyone trusts me to repair anything until I remember that adult is really just about pretending you know wtf you're doing.
Once I got that as locked down as it could be, the head band and tail band were applied without much issue. The end paper was the next challenge. The glue needs to be smeared fairly quickly over the whole page and case, especially at the edges, so the end paper can bond everywhere without any gaps, adding to the overall strength of the book. Again, the bone folder was employed to get that nice crease and really smooth out the end page.
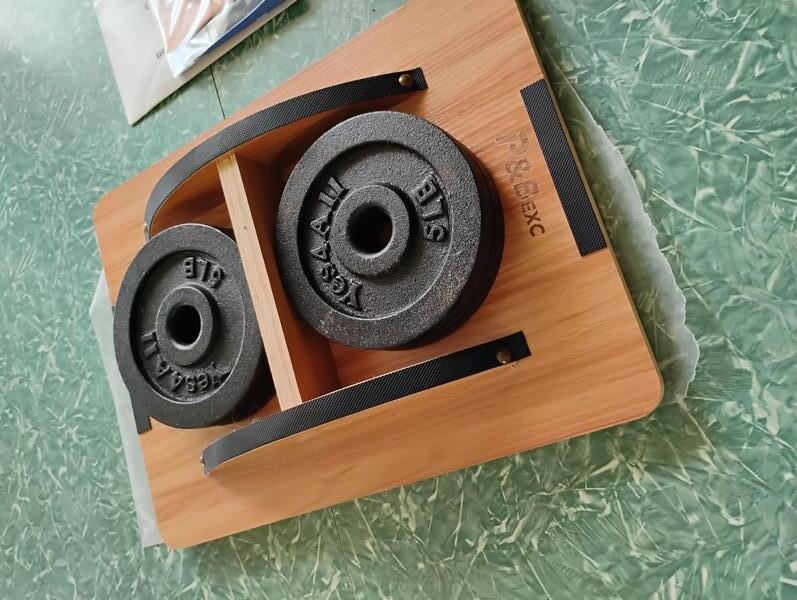
Lacking a press, I used some free weights and a balance board from my collection of "Stuff I'm Supposed To Be Doing For Physical Therapy." I actually don't know much force should be applied, but 20lbs seemed like enough after all was said and done. The press we used in the case binding class was was pretty fancy, but I don't recall having to crank down on it or anything. You're basically just trying to apply enough pressure to keep things flat.
On The Shelf
Overall, I think this project took maybe four collective hours over two days, with the understanding that I did things incorrectly and there may be some steps I accidentally skipped or didn't know about. Even so, not a terrible way to spend a quiet evening or two after work. Well, maybe the book doesn't think so.
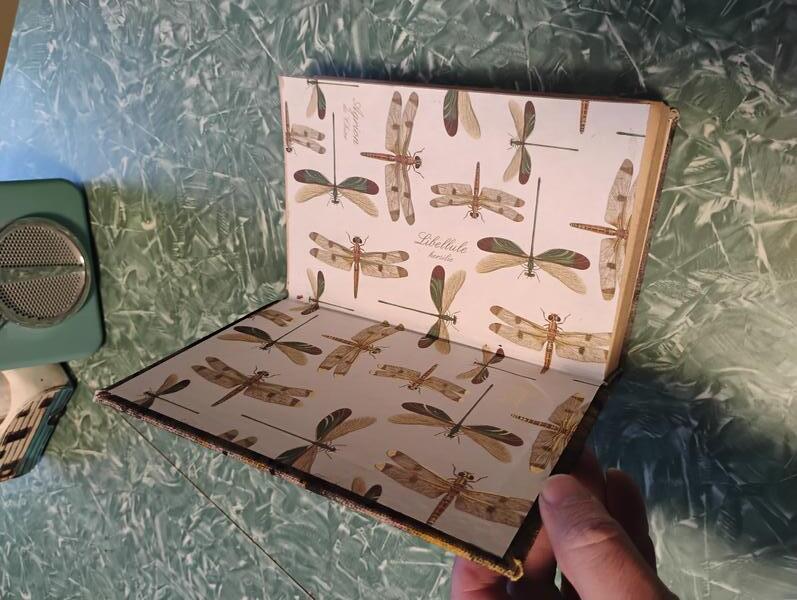
There were a few other cutting mistakes that didn't really become apparent until I had the case on and closed the book. I needed some more width on the cardboard and cloth covering so the case extends out past the right margin a bit more. As it is, it sits nearly flush, which is not preferred for this type of binding. The rescued back page also started separating again when I opened the cover after the glue set, exposing the mull. Still, it is holding strong.
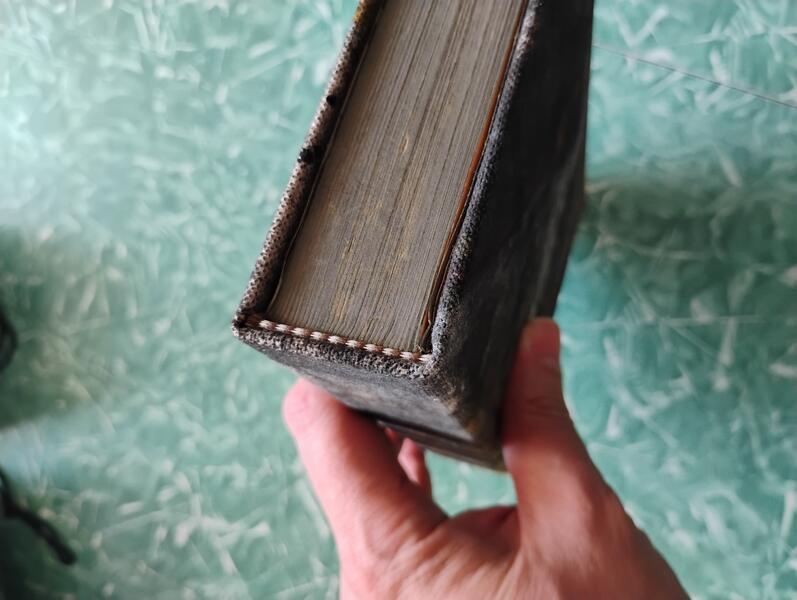
I also slightly overshot the width on the spine, but that may have more to do with the thickness of the canvass I used than my cut. The head and tail bands came out nice though, being an interesting little bit of the book that I always thought was more of a decorative flair thing. As it turns out, they're added to books to help take some of wear and tear off the top edge of the spine, since that's what people tend to grab when they pull a book from the shelf. It's a small detail I never noticed before, but looking through my library, it's on every hard cover book I own. Huh.
Despite my blundering and probably brutish methodology, this was a pretty fun failure. I think this also may have been my first real attempt at repairing a thing that wasn't a piece of furniture or something that required electricity. Much like a those pies at the counter in 7-11, the book was now very shelf-stable, albeit a bit ugly and malformed. And yet, I love it, so it will remain in my collection as my first attempt, hopefully joined by much improved examples in the near future.
With failures come a responsibility; one of acknowledgement and improvement. I'm not ready to start telling everyone they always need to be better than they were yesterday since, let's face it, that shit is exhausting. Maybe just try to be better than you were last month, or even last financial quarter or whatever if you really need some time. Nobody improves overnight, of course, but nobody improves without fucking up a little bit either, so embrace it and move on.
Now go forth to fail, learn and grow.